Test Tools- ABAP Debugger
Test tools in the ABAP workbench are-
1) ABAP debugger
2) Runtime Analysis
3) Performance Trace
In this post, we will discuss about ABAP debugger. This is one of the important topic and you will face questions in interviews.
How do you start ABAP debugger?
There are many ways to start ABAP debugger. They are-
1) From any screen enter /H in the command field to start debugging.
2) From any screen you can start ABAP debugger through MENU System ® Utilities ® Debug ABAP.
3) From the initial screen of the ABAP Editor- Program ® Execute ® Debugging (or the Debugging pushbutton).
4) From the Object Navigator (SE80) Select a program and choose Test/Execute from the Development Object menu. The Choose Execution Type dialog box appears. Choose Debugging
5) You can set break point in the program directly and you can enter into debugging mode in middle of program execution
What is the use of debugging?
Imagine you have written a report program, you have fixed all the syntax errors in the program and activated it. After executing the program you find that the output produced is not matching the expected output. Then you have to examine your code. You can execute the program in debugging mode and can watch the values of fields and tables used in the program.
What options (Display modes) is there in debugging tool?
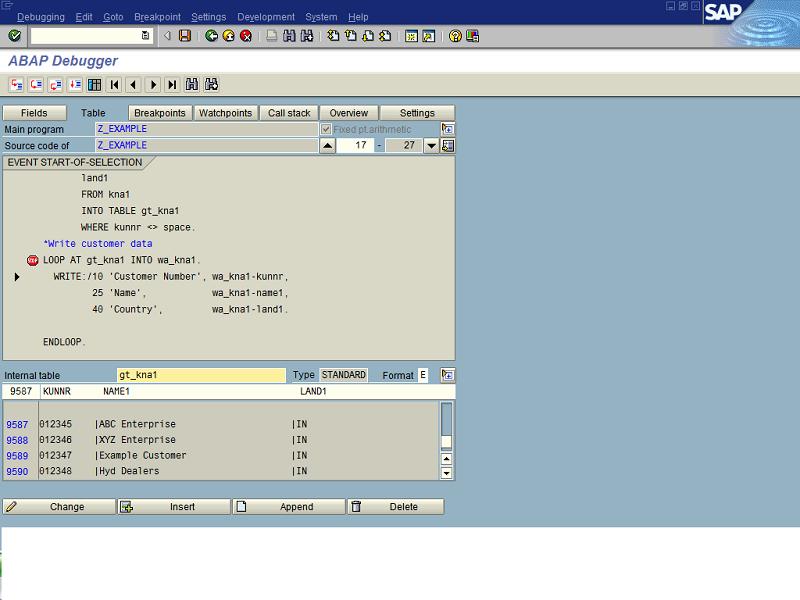
To make you acquainted with debugging tool, here I am pasting the screen shot.
You can see the following display modes in the screen-
1) Fields
2) Table
3) Breakpoints
4) Watchpoints
5) Calla
6) Overview
7) Settings
In this post, we will discuss the basic and important display modes 1, 2, 3, and 4. In future we will see the advanced modes Calls and Settings.
1) Fields
This is the default display mode in the debugging. You can see the contents of fields (Data Variables). The maximum number of fields you can see is eight. We can also see three most important fields in this mode. Those system fields are always displayed at the bottom of the screen. The fields are-
SY-SUBRC, SY-TABIX & SY-DBCNT.
We can also edit the contents of the fields; to save the contents you should click the Change (Pencil Icon).
2) Table
Displays the contents of an internal table. This mode allows us to display and edit the contents of the internal table.
3) Breakpoints
Maximum number of Breakpoints displayed is 30. To set break point in the program, choose the line and then click on STOP (RED ICON). The line will be highlighted with yellow color.
You can also set the break point dynamically when you are in debugging mode. To set a break point in debugging mode, double click on the line.
4) Watchpoints
If you want to interrupt a program when the contents of a field or structure change, use a watchpoint. You can set up to five watchpoints, including watchpoints for strings.
A watch point can be either local or global.
Enter the name of the field for which you want to create watch point. If you want to stop when ever the value of the field changes, then the creation of watchpoint is over.
But if you want to compare the value of the field with another field or value, you should choose the relational operator and you should provide the name of the field or value in the box provided.
I will explain you the advantage of the watchpoint in real time.
You are debugging a program which is of 5000 lines. You can not execute the program line by line. It takes longer time. You want to observe the contents of few fields. You can create watchpoints for those fields. So that whenever your field’s value changes the program will come to stop automatically displaying message ‘Watchpoint reached’.
Another example is , if you want to stop the loop execution at certain line. Imagine your internal table is having 10000 records. You want to observe the execution of the logic at record 5000.
Loop at itab.
*Processing logic
Endloop.
You can create a watchpoint with any one of the itab’s field and you can stop at 5000 record. You need not execute the loop record by record.
Stepping through source code:
There are four different ways in which you can step through the source code of a program you want to analyze:
1) Single Step
This option is used to step through the program statement by statement. This allows you to branch into subroutines and function modules, and to execute these routines step by step as well. Once a subroutine or function module has been processed, control returns to the statement following the CALL FUNCTION or PERFORM statement.
2) Execute
This option is used to process a program line by line. All of the statements on the current line are processed in a single step. If you are positioned on a line that calls a subroutine and you choose Execute, the Debugger processes the whole subroutine and then moves on to the line following the subroutine call. This allows you to jump through the statements within the subroutine.
3) Return
The Debugger returns from a routine to the point at which control returns to the main program. Use this option to return from a subroutine, function module, or called program to the calling program.
4) Continue
This option is used to process the program up to the next dynamic or static breakpoint or up to the cursor position. If there are no more breakpoints in the program and no cursor has been set, the system exits debugging mode and executes the rest of the program normally.
0 comments:
Post a Comment